
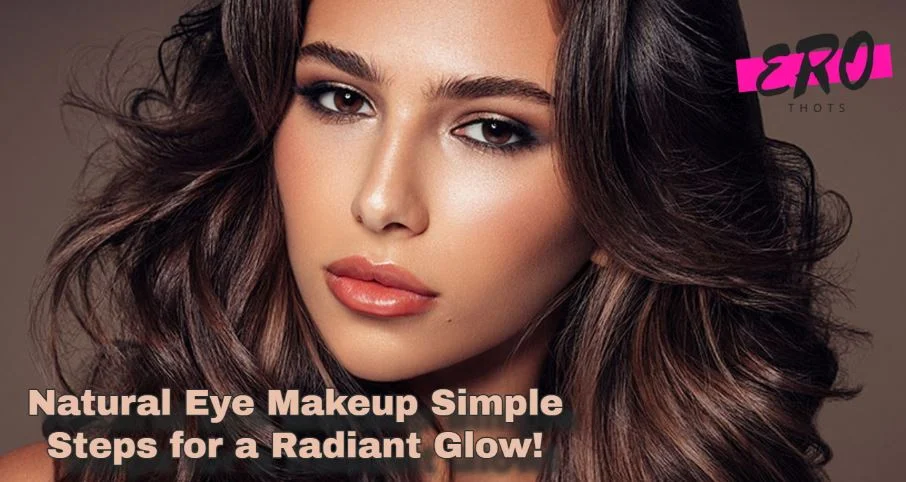
We often want a soft and fresh style that lets our eyes shine without seeming heavy. That is why Natural Eye Makeup has become such a favorite choice. It gives a light and glowing look that fits our daily life, work events or even a quick trip to the grocery store. When we talk about a radiant glow, we mean skin that looks bright, eyes that look awake and an overall simple warmth on our face. It is a friendly way to improve our features without going too far. With the right steps, anyone can learn how to make their eyes stand out in a nice, gentle way.
- When we aim for a natural eye style, we rely on a few key makeup items.
- We focus on shades that blend in with our skin, as these help us feel confident. A base of soft colors can do a lot to make our eyes pop.
- This approach is also kind to our wallet because we do not need many fancy products.
- A few quality items will last a long time and can be used in many looks.
- Our goal here is to find a balance between subtle color and a smooth finish that suits our skin tone.
- Plus, when we look for a natural style, we feel at ease knowing it will work with any outfit we choose.
Natural Eye Makeup can truly make a difference in how we see ourselves. We look calmer and our eyes appear brighter. It is not about perfection; it is about feeling like we are showing our best selves to the world. There is a simple joy in looking in the mirror and seeing eyes that stand out in a mild and lovely way. By picking a neutral palette, we avoid the harsh lines or bold colors that could overshadow our natural beauty. When we want our eyes to look open and lively, a subtle color range works wonders. It is a go-to style that even first-timers can learn quickly. Let us explore the basics and see how easy it can be to master the art of a light, bright look.
1. The Four-Minute Routine, Bare Lid to Finished
Start on a dry lid. Not a freshly moisturized one, which is its own problem and gets covered in a minute.
Sweep the base shade across the whole moving lid, lash line up to a bit past the crease. This shade has one job. Most people have some natural discoloration on their lids, a little purple or brown or just unevenness, and the base evens that out so whatever goes on top sits flat instead of patchy. If it’s doing the job properly you shouldn’t really be able to tell it’s there.
Then the crease color. Small amount on a fluffy brush, tap most of it off, work it back and forth along the crease in short strokes and build from there. The usual failure at this step is loading the brush and pressing hard on the first pass. You get a hard line, then spend five minutes trying to soften it, which never quite works.
Pencil next. Press it into the roots of the upper lashes instead of drawing along the skin above them, small back and forth motions, filling the gaps between the lashes. Done right it doesn’t read as eyeliner at all. It reads as thicker lashes. Keep it on the skin side, there’s a solid clinical reason not to take it to the inner rim and section five gets into that.
One coat of mascara on the top lashes. Wiggle at the base, then pull through. Bottom lashes are optional and skipping them usually makes the whole thing softer anyway.
Want a bit more brightness? A small tap of light shimmer at the inner corner catches light every time you blink. Keep it to roughly the size of a grain of rice. Which is not a precise measurement, obviously, but it’s more useful than telling you to apply a small amount.
2. Primer Is Optional – The Wait After Moisturizer Is Not.
You can skip primer. Most people can, and a thin tap of concealer does more or less the same job.
What you can’t skip is the gap between moisturizer and shadow. Eye cream to keep my skin soft needs a few minutes to sink in, and powder pressed onto a lid that’s still tacky grabs unevenly and then creases within the hour. Two or three minutes usually does it. Do your brows, find your shoes.
3. Hooded And Monolid Eyes Need The Color Placed Above The Crease, Not In It
So where does the crease color go if you can’t see your crease when your eyes are open?
Nobody answers this in a beginner routine, and it’s the situation for an enormous number of people. Every guide says apply to the crease. On a hooded or monolid eye the crease is either tucked under a fold or isn’t there as a visible line at all. Follow the instruction literally and the color vanishes the second you open your eyes, so you add more. Then a bit more. Then it transfers onto the skin above, and by three in the afternoon there’s a smudge on your brow bone and a bare lid underneath.
Same principle fixes both, applied differently. Put the color where it’ll still be visible with your eyes open, and keep checking as you go.
Hooded lids
Look straight into a mirror, eyes open, face relaxed. Find the highest point of your visible lid space, right where the fold starts covering things up. That line is where the deeper shade goes. Not your anatomical crease.
Apply with your eyes open, small strokes, glancing back at the mirror after each pass. This feels wrong the first few times. When you close your eyes it looks like you’ve put shadow far too high. You haven’t. Closed-eye application is exactly why hooded lids end up with invisible makeup.
Go easy on shimmer. Light-reflecting particles on a lid that folds will highlight the fold, which isn’t the effect anyone’s after. Matte and satin sit better.
The pencil at the lash line does most of the visible work on a hooded eye. If you’re short on time, that’s the step to keep.
Monolid eyes
Different geometry so a different approach. There’s no crease to define, so you’re building a gradient upward from the lash line instead.
Deepest color closest to the lashes, fading as it moves up. A soft band, roughly a third to halfway up the lid, blended until the top edge dissolves into your base with no visible boundary anywhere. Nothing gets hidden. Nothing gets carved out.
Blend horizontally across the lid instead of the back and forth crease motion, it keeps the gradient smooth. And because there’s no fold pressing down on the product, monolids hold shimmer beautifully. A wash of soft satin over the center of the lid picks up light in a way that reads as lit from inside.
Curling matters more here than on any other eye shape, since a straight lash line can sit low enough to shade the lid itself.

Deep-set and downturned eyes
Deep-set eyes already have shadow sitting in the crease naturally, so piling a dark shade in there doubles up and can read as tired. Keep the deeper color light-handed, put the attention on brightening the lid.
With downturned eyes the thing to watch is where you stop. Take pencil or shadow past the outer corner following the natural downward angle and you drag the whole eye down with it. Stop at the corner. Or angle up a touch.
4. Match The Shadow To Your Lid Skin, Not To Your Eye Color
Most articles sort shadow by iris color. Brown eyes get gold, blue eyes peach, green eyes plum.
That advice isn’t wrong, it’s secondary. What decides whether natural reads as natural is the contrast between the shadow and the skin sitting underneath it. A soft beige that disappears convincingly on fair skin goes chalky and gray on deep skin. A cool taupe that gives lovely definition on medium skin can look like a bruise on very fair lids. Iris color is the tiebreaker between two shades that already suit your skin. It isn’t the place to start.
| Your lid skin | Base shade | Crease or gradient shade | What to avoid |
|---|---|---|---|
| Fair, cool undertone | Soft ivory, pale peach | Warm taupe, soft rose brown | Gray-based taupes, which can read as bruising |
| Fair to medium, warm or olive | Light warm beige | Medium warm brown, soft bronze | Ashy browns, which go muddy on olive skin |
| Medium to tan | Golden beige, soft caramel | Rich chestnut, warm terracotta | Anything paler than your lid, which turns chalky |
| Deep | Warm honey, soft copper | Deep bronze, plum brown, espresso | Pale beige “universal nudes,” which go ashy and flat |
Couple of other things affect this more than iris color does. Lid discoloration, for one, since a lot of people have naturally darker or more purple-toned lids than the rest of the face and that changes what a base shade has to do. Texture too. Crepey or oily lids show shimmer differently no matter which shade you pick.
Test on the lid. Never the back of the hand, the skin there is a different color and a different texture entirely.
5. US Rules Restrict Which Colors Are Legal Near The Eye, And Where You Can Put Them
This part isn’t aesthetic, and it’s the part most beauty content skips.
In the US, color additives get regulated far more tightly than the rest of a cosmetic formula. A color additive can’t be used in the eye area unless the regulation covering that specific additive permits it, and additives listed for general cosmetic or drug use aren’t automatically cleared for eye-area products. Meaning a pigment that’s perfectly legal in a lipstick may not be legal in an eyeshadow. Which is why FDA guidance says to use only products intended for the eyes on the eyes, and warns specifically against using a lip liner as an eyeliner.
Two more from the same guidance. Kohl, sold in some places as kajal or surma, isn’t an approved color additive in the US, and reports have linked it to lead poisoning in children. Some products use the word on the label to describe a shade instead of an ingredient, so the ingredient list is where you check. Separately, no color additives are approved for permanently dyeing or tinting lashes and brows, and permanent lash and brow tints have caused serious eye injuries.
Then there’s the waterline. That damp inner rim just behind the lashes, popular spot for definition, and also where the meibomian glands open. Those glands make the oily layer that stops your tears evaporating too fast.
The research is fairly consistent about what happens. A cross-sectional study in the journal Cornea compared 42 healthy women aged 18 to 40, half of them using eyeliner at least three days a week for six months or longer. Tear break-up time in the eyeliner group averaged 3.0 seconds against 5.8 in the controls. Meibomian gland grading of two to three turned up in 85.7% of eyeliner users compared with 47.6% of controls. And conjunctival inflammation was around four times more common, 66.7% against 14.3%.
A much larger survey published in Scientific Reports in 2025 found the same pattern in symptoms. Eyeliner users scored above the dry eye threshold on the Ocular Surface Disease Index at 42.93%, against 33.38% of non-users. Among people applying liner directly to the lid margins that climbed to 48.17%. The same paper recommends keeping liner off the inner lash line and waterline, and swapping eyeliner out roughly every three months to limit bacterial growth.
None of which means giving up definition. It means keeping the product on the skin side of the lashes, which is where section one already put it. Press the pencil into the lash roots from outside and you get the same effect visually, without sitting pigment over the gland openings.
6. Six Things That Go Wrong, And What Causes Each
- Shadow up on the brow bone by afternoon. Nearly always placement too low on a hooded lid. Not a product failure.
- Chalky gray lids means the base shade is lighter than your skin. Go warmer and deeper.
- Hard edges you can’t blend out. Too much product on that first pass. Tap the brush off before it touches your face.
- Shimmer sits in fine lines and finds any crepiness, so if it’s highlighting texture, move it to the inner corner only, or switch to a satin finish.
- Irritation, redness, a gritty feeling. Stop using the product. FDA guidance is to discontinue immediately when a cosmetic causes irritation, and see a doctor if it doesn’t settle.
- Styes and infections that keep coming back usually trace to old product and shared applicators. Don’t share eye makeup. Don’t use store testers without a clean single-use applicator. And never add water or saliva to a drying product to bring it back, that’s how bacteria end up growing in the tube.
One more, and it gets its own line because it causes real injuries. Don’t put eye makeup on in a moving car. A bump or a sudden stop with a mascara wand or a sharpened pencil near your eye can scratch the cornea, and even a small scratch can turn into a serious infection.
Wash your hands first. Take it all off at night, gently. Most of what goes wrong with eye makeup traces back to one or the other.