
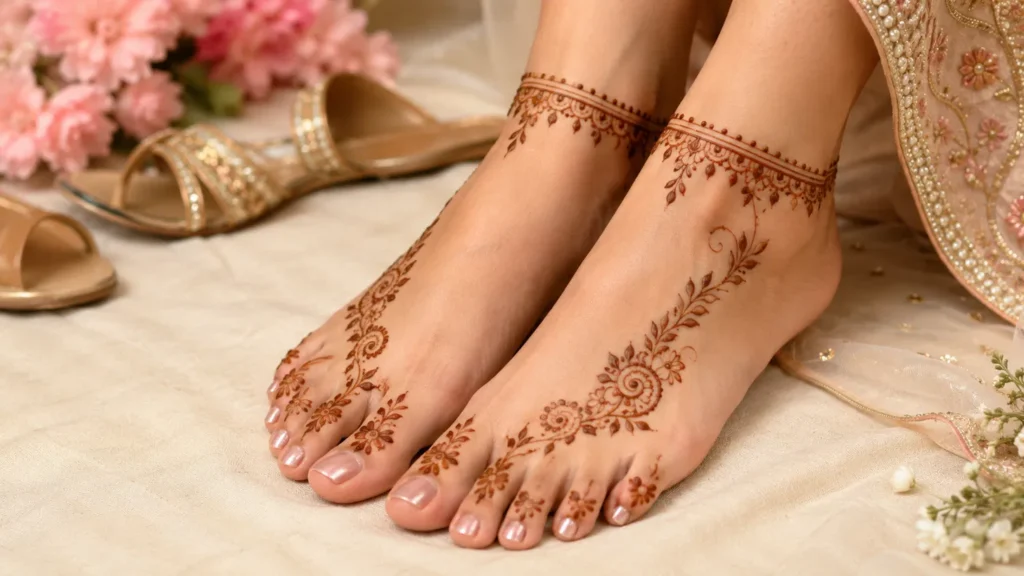
The skin on the bottom of the foot takes henna stain better than the skin on the arms, so mehndi on the foot adds a certain subtle advantage that few people even know about. You don’t need to cover everything to get something beautiful. A good placement, some nice lines, and a little bit of skin around the design will do more for you than an hour of fill ever could.
So whether it’s Eid, Diwali, a wedding, or you just like the way a vine looks curving past a sandal strap, here are five simple designs that work, plus the placement and aftercare details that decide how they actually turn out.
This foot design is considered simple
One main area, treated well. Honestly, that’s the whole trick.
It’s not that they’re not drawing enough. I’m seeing a flower here, a couple dots there, this random vine above the ankle. They’re not connecting the dots. Pick one spot. The toes, the side of the foot, the ankle, the bridge of the foot. Create your pattern there and the rest can be left skin-free. That vacant space is not a void, it’s what makes it purposeful.
1. A small flowery path
Flowers were an easy way to start, because they echoed the contours of the foot itself. One medium flower near the toes, a few leaves, a vine draping down over the ankle, and you already had something soft and feminine.
This is the one to reach for before Eid or a family function. Bridesmaids love it because it looks pretty in photos, but it doesn’t compete with the bride. Just don’t go too tiny with the petals. A mass of little, fussy petals gets busy on feet far too quick. A single clean medium flower with a couple of leaves almost always looks better.
2. Toe details when you’re short on time
Maybe you’re getting ready and there’s fifteen minutes left. Toe mehndi was made for that. Little dots, delicate lines, a flowerlet or ring bands round a toe or two, and the design is finished, because, after all, your toes are what the sandals show.
There’s one rule I would give. Whatever you do for one toe, you have to do for all of them. If you have a different idea for each toe, it’s accidental.
3. Anklet patterns that resemble jewelry pieces
If you want to wear an anklet without the risk of it getting caught or slipping off your ankle, you can draw an anklet with thin lines circling around your ankle, dots and tiny flowers, and a few thin chains hanging down. From a few feet away, they look really realistic.
It’s great for engagements and parties, and is very practical compared to all the other designs here, because even when your shoes cover your toes, the illusion is still there. It all comes down to line weight. If the strokes are thin, it reads as jewelry. If they are thickened, it reads as a heavy border.
4. Arabic style, where the empty space is the point
Arabic mehndi is also worth noting in that its design logic is strikingly different from the rest. Its designs always feature sharp outlined flowers, long strokes of foliage, and a lot of unfilled spaces. Arabic designs are often applied diagonally across the foot, or up one side.
That openness is exactly why it flatters feet, you get something that looks bold and complete while covering maybe a third of the skin. It photographs beautifully with sandals. The discipline is to leave the gaps alone. Each time you fill one in, you take the design farther from what makes Arabic design work, so you need to stop sooner than your hand wants to.
5. Bridal feet without the full coverage
Many brides want their feet decorated but don’t want the mehndi to cover the entire ankle to toe, especially when the hands already have full mehndi designs of their own.
One hero works, something like a floral anklet or a minimal mandala in the middle of the foot, and the rest clean and light. This works really well for nikah brides, courthouse, engagements, and destination weddings, where the outfit is lighter anyway. Your feet are quieter than your hands, but they should still feel special. They’re supporting, not competing.
The footwear has more of an influence
Before even designing the beautiful sole pattern, you should have a knowledge of the shoe, so that you can decide its placement.
Open toes show off the toes and any floral trail. Covered toes shift the value and interest to the ankle instead. With heels, toe details or smaller trails usually look cleaner than one big center design, and with traditional flats a floral trail or tiny mandala fits nicely into whatever window space the shoe leaves.
Getting the application right, and getting the color
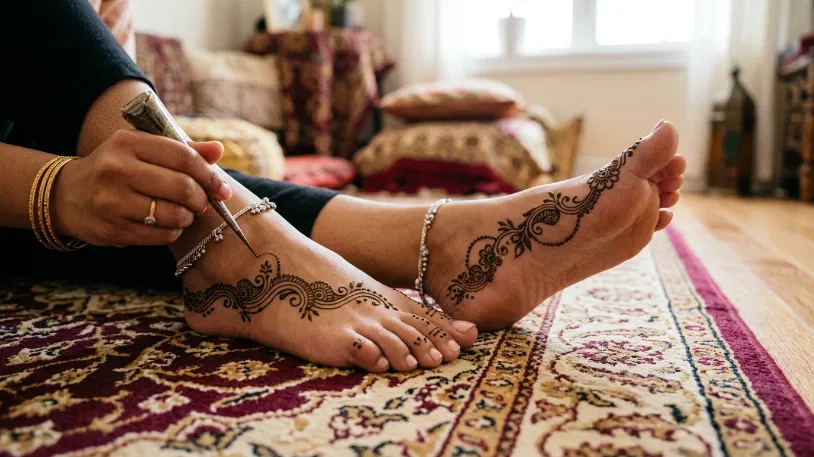
Your feet should be clean and free of any lotion, oil, or cream, while henna stays on the skin better when it is bare and slides off easily on oily skin. You also want to take your time on the lines, as thin, even lines matter much more in simple designs.
Then comes the part that actually determines your color:
The paste is usually left on for several hours, and usually the longer, the darker the result. Feet are usually left on longer than, for example, hands, because they are not used for regular tasks.
Instead, scrape the dry paste off the skin and stay away from water for the rest of the day, if possible.
A time-honored trick to keep the paste from drying too quickly and causing the stain to deepen is to dab it with a lemon-sugar mixture.
Heat develops the color; cold feet stain lighter.
If the paste comes off and your stain looks orange, don’t panic, it will develop into a deeper red-brown in a day or two. Wait until tomorrow to judge the true color.
One last safety note: natural henna dyes the skin something in the orange to brown range. Black henna cones that promise black color immediately, labeled “black mehndi” and similar, almost always include one of the active ingredients of hair dye, which should not be used on skin. Because of the severe reactions that can cause scarring, black henna is considered an unsafe product by the FDA. Avoid any cone with outrageous claims.