
Not every mehndi look needs to cover your whole hand and take two hours of sitting dead still, and honestly the simple ones often look better, because there’s something clean and deliberate about a small design done well that a rushed, cluttered full-hand pattern just never manages.
So this is for the times you want something pretty and quick. A festival, a friend’s wedding where you’re a guest and not the bride, or just a random Sunday when you fancy it. Easy designs, the kind you can actually do yourself without years of practice behind you.
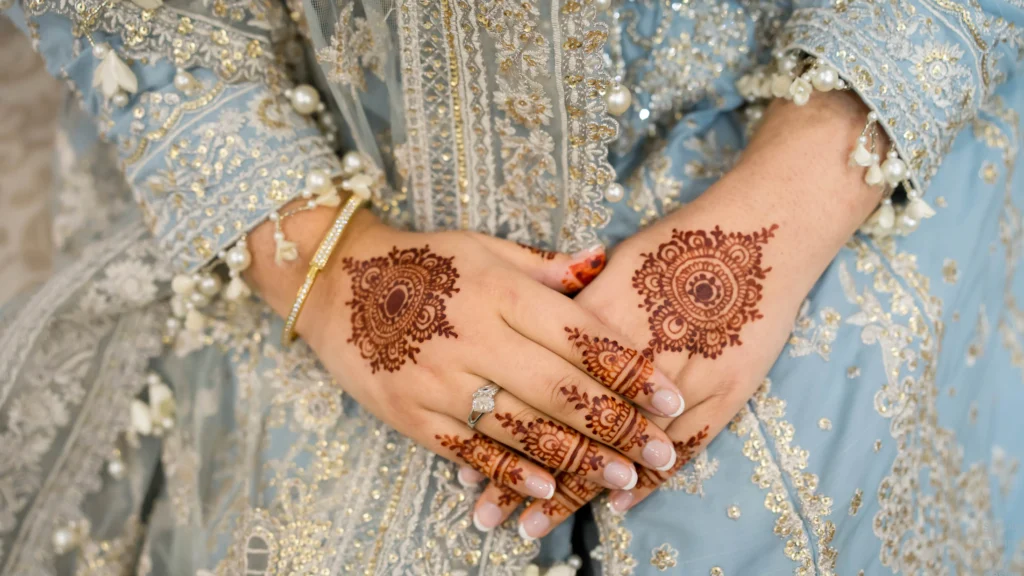
Why simple mehndi designs often wins
Here’s the thing people miss. A simple design is far more forgiving, because when you’re working with just a few clean elements there’s way less that can go wrong, whereas a dense intricate pattern shows off every little wobble and smudge you make.
Simple suits more occasions too. A big bridal-style pattern looks gorgeous at a wedding and slightly much at a coffee morning, but a delicate vine down one finger works basically anywhere, which is what makes it such an easy fashion choice when you just want a small seasonal touch. And it’s faster, obviously, which really matters when you’re doing your own hand with your non-dominant one and your patience is running thin.
The building blocks worth knowing
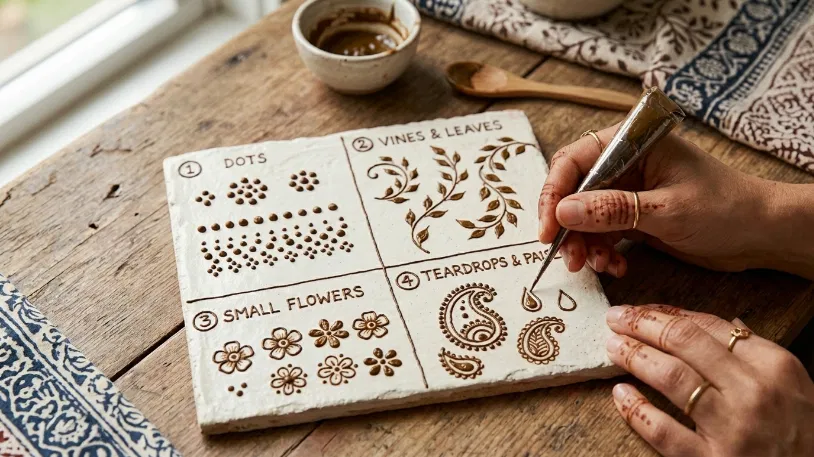
Almost every easy mehndi look is built from a handful of the same basic shapes, and once you can do these few things you can mix them into endless combinations.
- Dots. The easiest thing there is, and weirdly one of the most effective. Rows of them, little clusters, a dot sitting inside a shape. They fill space and look deliberate.
- Vines and leaves. A curved line with small leaves coming off it, which runs down a finger or curls across the back of the hand beautifully.
- Small flowers. A central dot with petals around it, and it sounds basic but it looks lovely, and you can scale it up or down however you like.
- Teardrops and paisley. The classic mango shape, a bit more advanced but genuinely simple once you’ve drawn a few and got the curve.
Don’t feel like you need to nail all of them at once. Pick one, get comfortable with it, add another. That’s honestly how everyone builds it up.
Easy designs to actually try
A single finger vine
The best place to start, and one of the prettiest for how little it asks of you. You just run a thin vine up one finger, usually the ring or the middle one, with tiny leaves alternating down the sides and maybe a small flower at the base.
It’s quick, it’s elegant, and because it’s only one finger there’s very little that can go wrong, which is exactly what makes it perfect for a first go or a last-minute look before you head out.
A back-of-hand flower
One flower on the back of the hand, roughly where your hand’s at its widest, with a few leaves or dots trailing off it toward the wrist or the fingers. Keep the flower itself simple, a dot with rounded petals, and let those trailing bits give the whole thing some movement.
This one reads as a more “proper” design than a finger vine but takes barely any more effort, which is a nice little trick to have up your sleeve.
A minimalist wrist band
If hands feel intimidating, just start at the wrist. A simple band of a repeating pattern, dots and a zigzag, or a row of tiny leaves, wrapped around like a bracelet. It’s forgiving because it’s repetitive, so even if it’s not perfectly even it still reads as intentional, and it happens to be one of the trendier looks going right now anyway.
Fingertip dips
Barely a design at all, and gorgeous for exactly that reason. You just colour the tips of your fingers like you’ve dipped them, sometimes with a little cuff of a line or some dots below the colour. It’s modern, it’s minimal, and it takes about five minutes, which is great for when you want something but not a whole pattern.
A few things that make simple designs look good
With simple looks the design matters less than the execution, because there’s nowhere to hide a mistake, so a few small habits go a long way.
Let the paste sit as long as you can stand it, ideally a few hours, because the longer it stays on the darker and longer-lasting the stain, and this is genuinely the single biggest thing separating a rich result from a faded one. Keep your lines steady by resting your hand on something solid and moving slowly, since simple designs really do live or die on clean lines. And do the fiddly bits early while your hand’s fresh and steady rather than at the end when you’re rushing to finish.
One more that people always forget. Don’t wash the area for a good while after the paste flakes off, because the stain keeps developing for a day or so, and getting it wet too soon just cuts it short.
Prepping and keeping it lasting
It helps to start with clean, product-free skin, because oils and lotions sitting on the surface stop the henna gripping properly, so a quick wash beforehand and nothing else on the area is all the prep you really need. Good skin underneath helps too, which is where a bit of general skin care in the days before pays off more than people expect.
After that, a simple design that stays beautifully dark for a week beats an intricate one faded to orange by day two, so a little aftercare is worth it. Don’t scrub the area, dab a bit of oil or balm on it before you shower to protect it, and just be gentle with it for the first day or so.
That’s really the whole thing. Pick one easy element, take your time on clean lines, let the paste sit properly, and you’ll end up with something that looks far more considered than the effort it actually took, and if you want more small beauty ideas like this there’s plenty over in the beauty tips section. Which, for a simple mehndi look, is exactly the point.