
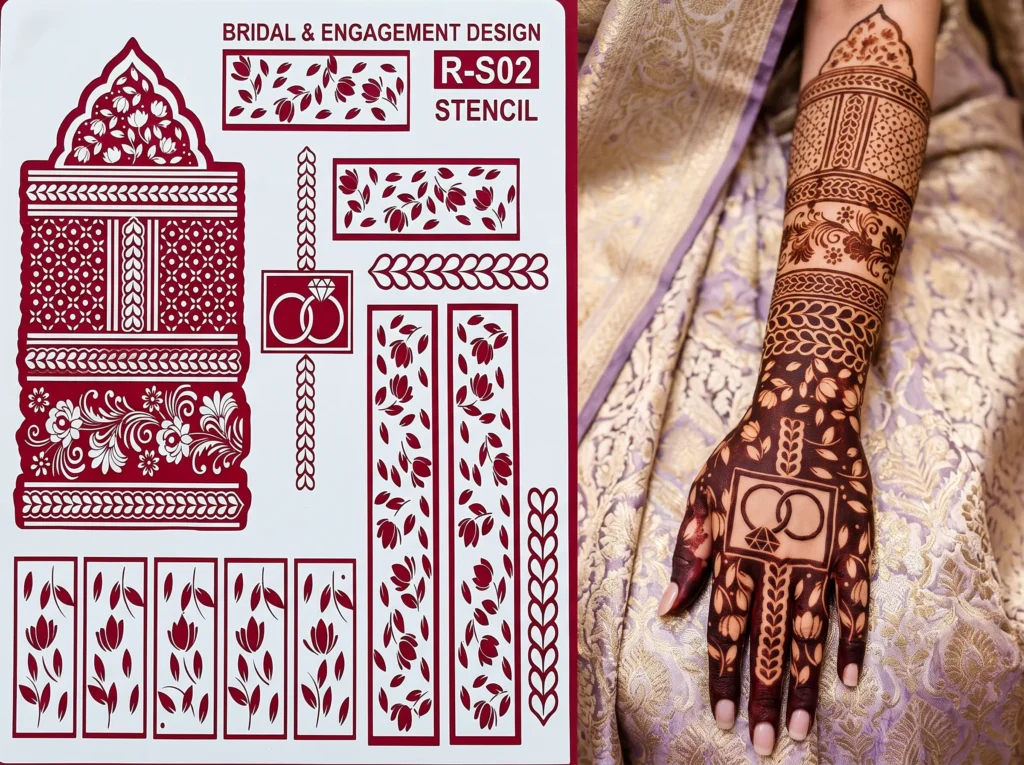
Doing your own bridal henna sounds easy until you switch hands and the lines start to wobble, and that’s the moment full hand bridal henna stencil designs come in handy, because the sticky vinyl sheet already has the pattern cut into it and all you do is fill it in.
They cost less than a bridal artist too, and both hands come out matching, which is hard to do freehand.
Buy A Full Hand Set Over Loose Pieces
Stencils come 2 ways. A full hand set is 1 big sheet shaped like a hand, with the design and the finger bands already in place. Loose pieces are separate flowers, bands and borders that you put together yourself.
For a bride, go with the full set. The spacing is done for you, and that’s what makes it look like a pro did it.
Before you buy, check for 3 things:
- a size that fits from your fingertips to your wrist (measure first, because sizes vary a lot).
- glue that’s safe for skin, because the sheet stays on for a few minutes.
- a left and right pair, so the thumbs point the right way on both hands.
5 Full Hand Bridal Stencil Designs To Choose From
1. Floral Sleeve For The Back Of The Hand
A big flower sits near the knuckles, leaves run down to the wrist and every finger gets its own band. It’s the easiest full hand stencil to fill, and it covers the most skin in the least time.
2. Palm Mandala With Finger Bands
A round mandala goes in the middle of the palm, with matching bands that run up all 5 fingers. This is the classic bridal palm, and the stencil keeps the circle even, which is tough to do by hand.
3. Jaal Net Pattern
Jaal is a net of tiny squares or diamonds that covers the whole back of the hand. Drawing it freehand, the squares get uneven fast. With a stencil they come out the same size from the knuckles to the wrist.
4. Lace Glove
This one covers the back of the hand with small flowers and dots and ends in a wavy edge at the wrist, like a see-through glove. It’s a good fit for brides wearing a white wedding dress.
5. Peacock Palm
A peacock with its tail spread out fills the palm, with vines and flowers around it. Peacocks are a favorite in bridal henna, and they’re hard to get right freehand because both sides of the tail need to match. The stencil takes care of that.
Fill It In And Peel It Off In 5 Steps
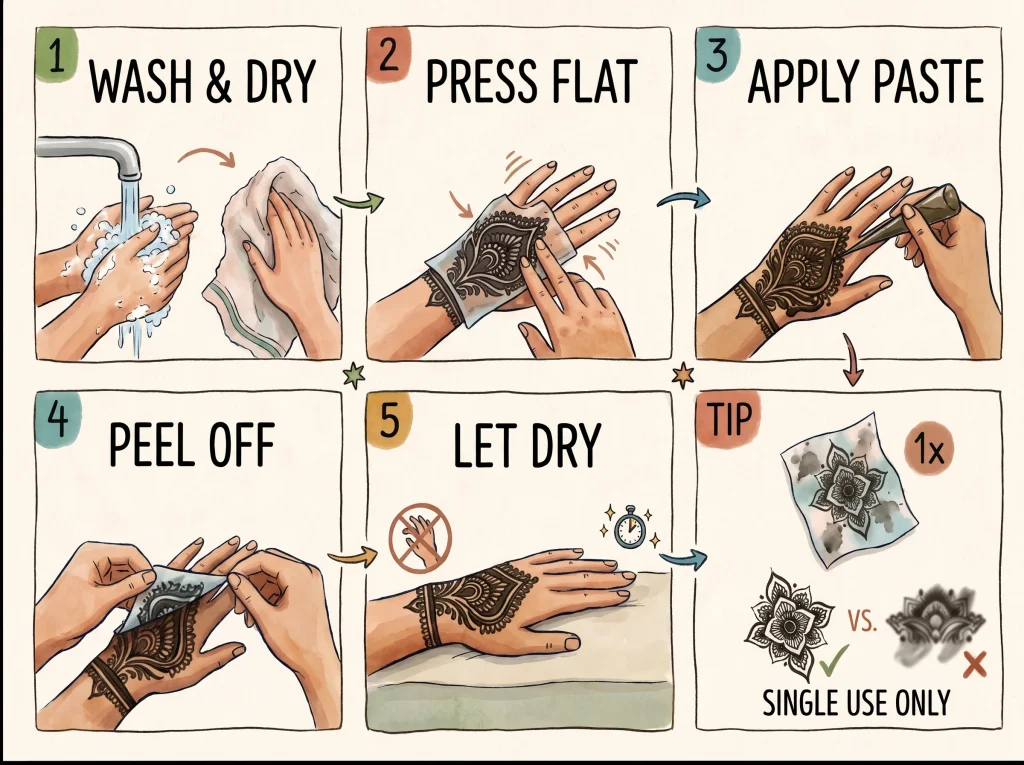
- Wash your hand with soap and dry it. Lotion keeps the sheet from sticking.
- Press the sheet down from the middle out and rub all the edges flat, especially between your fingers.
- Spread the paste over the open spaces in an even layer. If it’s too thick, it can slide under the edges.
- Peel the sheet off right after you fill it, before the paste starts to dry, pulling slowly from 1 corner.
- Don’t move your fingers until the paste is dry. Bending them cracks the lines.
Most stencils only work once. If you try to use one again, it’s stretched out and the lines come out blurry.
Use Smooth Paste That Spreads Easily
A stencil needs paste that slides into every cut-out, about as smooth as toothpaste. Lumpy or dry paste leaves holes in the lines, and paste that’s too runny seeps under the edges.
You can squeeze it straight from a henna cone and spread it with the tip, or smooth it over the openings with a flat wooden stick. Work 1 section at a time, starting at the fingertips, so you’re not reaching across wet paste.
Try It On Before You Use Any Paste
Peel back 1 corner of the backing and lay it in place. Check if it bends over your knuckles, if it covers the bump of your wrist bone and if the finger bands line up with your real fingers.
Cut off any extra with scissors. Then take a quick photo so the second one goes in the same spot. This takes about 5 minutes and saves you from most mistakes.
Hide The Gaps With A Henna Cone
Where 2 parts of the sheet meet, you might see a gap or a line that doesn’t quite connect. Draw a dot or a little curl over it and no one will notice in your photos. Filling in your fingertips and adding a row of dots around the biggest shapes also makes the whole thing look more finished.
Want to make it personal? Hide the groom’s initials in one of the petals, the same idea we shared in our new mehndi designs for the minimalist bride.
Fix Mistakes Right Away
- Paste went under an edge: wipe it off fast with a wet cotton swab before it stains.
- A line is missing: fill it in with your cone while the rest is still wet.
- The sheet moved halfway through: stop, peel it off, wipe off the wet paste and start that part over.
- There’s a thick blob where 2 pieces overlapped: scrape the extra off with a toothpick.
Most sets also come with smaller pieces for your feet, and these simple mehndi designs for feet are a good pick if you want something lighter there. Try it out on 1 hand about 2 weeks before the wedding, so you already know how it works on your skin when the big day comes.