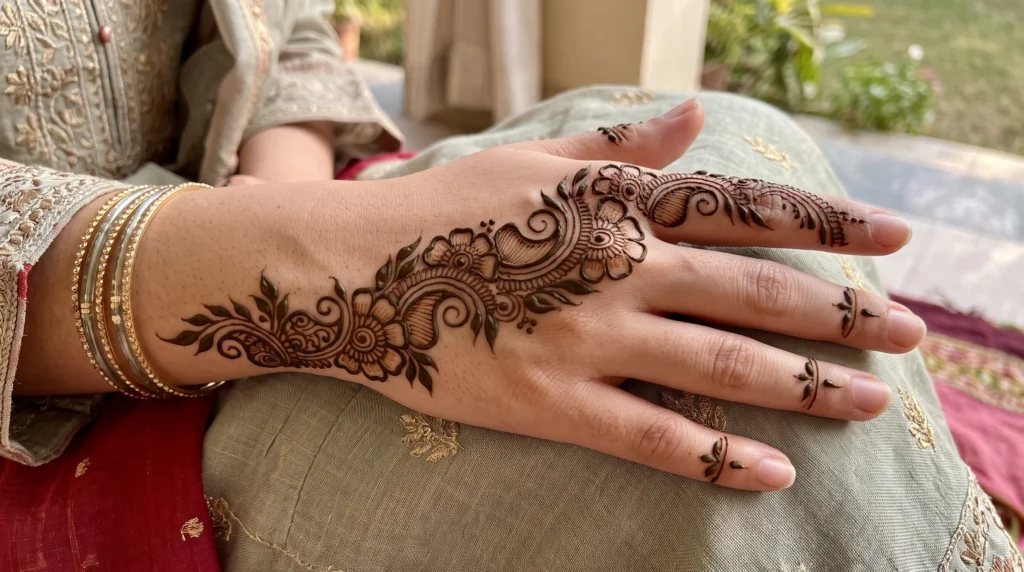
Simple Arabic mehndi designs are henna patterns made with thick lines and only a few leaves or flowers running at an angle across your hand, with plenty of bare skin left in between and the middle of the palm usually kept empty, which is why they look so clean and light next to the heavy bridal henna that covers almost every inch of the hand. Mehndi is the word many people use for henna art, and because this style has less to draw, it’s an easy one to do yourself at home before a wedding, a party or a summer weekend.
Keep The Palm Mostly Bare
The lines are bold and they stay bold, start to finish, with little or no shading anywhere. Shapes get space around them. Most mehndi designs move at a slant, from the wrist up toward the index finger, instead of sitting in a circle in the middle of the palm. The shapes come from nature too. Flowers, leaves, vines, now and then a bird, and dots tucked into the small gaps.
And it stays low. Arabic mehndi doesn’t usually go far past the wrist.
Stop At Three Or Four Shapes
Pick 3 or 4 shapes and repeat them. A vine with 6 leaves spaced out evenly will look cleaner in pictures than 40 tiny petals crammed onto one palm, and it’s faster.
Try These Six Less Common Designs
1. Join Both Hands With One Vine
This one’s fun for photos. The vine starts on the outer edge of your left palm and finishes on your right. It only looks complete when you hold your hands side by side, palms up.
Do the left half first. Then line them up, put a dot where the line should cross over, and finish the right side from that dot. Apart, it looks like 2 little branches.
2. Run The Vine Along The Outer Edge
A thin vine from the bottom of your palm up the pinky side, ending at the tip of your pinky, with the leaves pointing outward. That’s it. You barely see it from the front, but it shows when you wave or pick up a coffee cup.
3. Draw A Chain From Ring To Wrist
You know those hand chains some brides wear, the ones that hook from a ring down to a bracelet? This is the henna version. Start with a thick ring around the base of your middle finger. Run 1 line down the back of your hand to a small flower at the wrist, then finish with a thin bracelet line. No filler and no shading, the whole thing is 1 continuous line.
4. Outline The Petals And Leave Them Empty
Draw 1 big flower, but only the outline of each petal, and make that outline thick. Then fill in the center solid. You get the look of a detailed flower without any shading at all.
It sits best on the back, a little toward the thumb, with 2 short leaves trailing down from it.
5. Follow The Curve Between Thumb And Index
Good one if your straight lines come out wobbly. The skin between your thumb and index finger already curves, so you let it lead. Start at your thumb tip, follow that curve down and around, and come back up to the base of your index finger. Leaves go on the outside of the curve only.
6. Put One Bird At The Wrist
You don’t see birds much in simple designs, even though they’re a classic Arabic shape. Draw one about the size of your thumbnail on the inside of your wrist. Let the tail turn into a vine that curls up toward your thumb. Fill in the body. Draw the wing as 3 open lines, because if you fill that in too, the bird turns into a blob once the color darkens.
Match The Design To Your Hand
Long fingers look great with the outer edge vine or the ring to wrist chain. Shorter fingers do better with something on the back of the hand, like the outlined flower, since a line running down a short finger makes it look even shorter.
Wide palms have room for the vine that joins both hands. Narrow palms, go with the thumb curve or the wrist bird.
Got dark nail polish on? Keep the mehndi away from your nails and knuckles or it all starts looking busy.
Skip Anything Sold As Black Henna
Real henna never turns black. It stains reddish brown, period, and the indigo some sellers blame for the black color doesn’t dye skin black either.
What usually does is PPD, a chemical from hair dye. Hair dye has to keep it under 6%, and black henna pastes have tested anywhere from 10% to 80%. Reactions can mean blisters and bad itching, often showing up 3 to 12 days later, and sometimes permanent scars. There are reports of kids who reacted to black henna, reacted again when exposed later on, and were left with light patches in the shape of the design.
So ask what’s in the cone. Anything that promises black in 20 minutes, skip it.
New to this? Try the outer edge vine first, since it’s small and quick and it’ll show you how dark henna gets on your skin before you commit to something bigger.