
You know that feeling when you’re doing your makeup and accidentally nick yourself with a sharp eyeliner pencil or scratch your skin with your nails? I’ve been there too. As someone who’s worked with countless makeup clients, I understand how important it is to prevent infections from these small wounds. Let me share everything I know about keeping your skin safe while still achieving that perfect makeup look.
Makeup-Related Wounds and Infection Risks

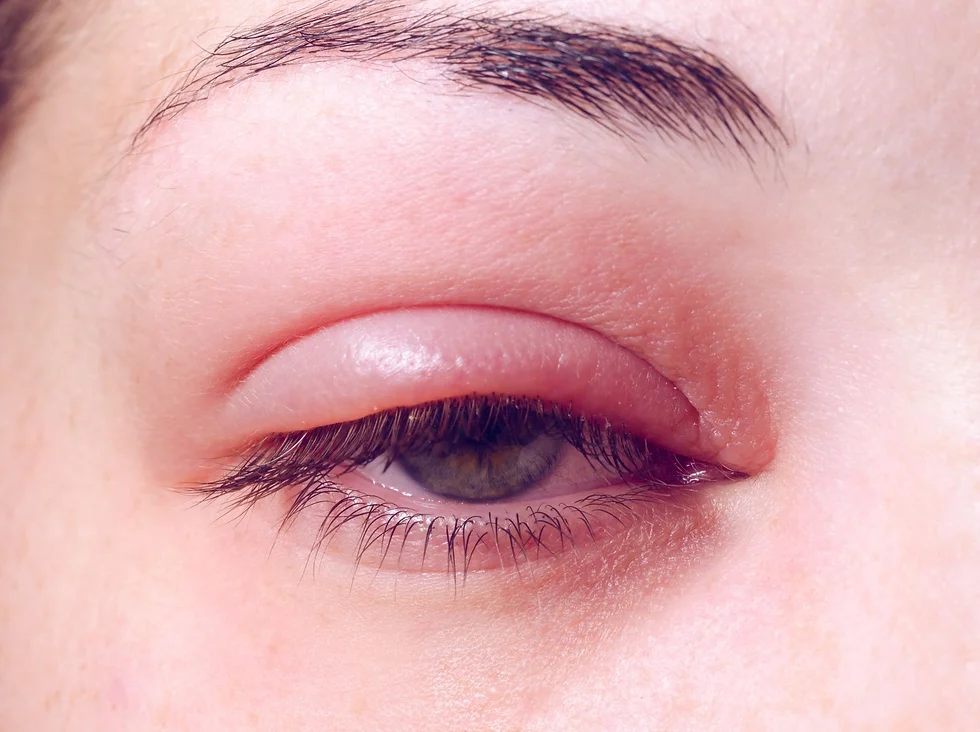
When you’re rushing to get ready in the morning, it’s easy to get small cuts or scratches while applying makeup. Maybe you’ve scratched your eyelid with a mascara wand or cut yourself with an eyebrow razor – these things happen to the best of us. What many of us don’t realize is that makeup tools can harbor bacteria that might lead to infections in these tiny wounds. Infected wounds can cause pain, swelling and fever and delay your return to normal life. With necessary precautions like maintaining hygiene, keeping wounds clean and a healthy diet, you can prevent infection. Your makeup bag is actually a perfect breeding ground for bacteria, especially if you keep it in your bathroom where it’s warm and humid.
I’ve seen many cases where people continue their makeup routine despite having small cuts, which can introduce bacteria directly into the wound. The risk is even higher because makeup products themselves can become contaminated over time. Think about it: every time you dip that brush back into your product after touching your face, you’re potentially transferring bacteria. Plus, when you’re dealing with areas around your eyes or mouth, you’re working with extra-sensitive zones where infections can be particularly troublesome.
Signs of Infection During Your Makeup Routine
Let me tell you what to watch out for when you’re dealing with a small wound while wearing makeup. I always tell my clients that catching an infection early can make a huge difference in healing time.
| Warning Sign | What to Look For | What It Means | Action Required |
| Temperature Changes | • Area feels unusually warm • Hot to the touch • Increased sensitivity | Early sign of inflammation and possible infection | • Stop makeup application immediately • Clean area gently • Monitor for 24 hours |
| Skin Color Changes | • Increased redness • Redness spreading beyond wound • Darkening around wound edges | Inflammatory response indicating possible infection | • Remove all makeup • Avoid covering with concealer • Document spread of redness |
| Unusual Discharge | • Yellowish fluid • Greenish discharge • Cloudy secretions | Active infection present | • Seek medical attention • Keep area clean and uncovered • No makeup until cleared |
| Pain/Sensation | • Throbbing feeling • Increased tenderness • Pain when applying pressure | Infection-related inflammation | • Discontinue makeup use • Avoid touching area • Monitor pain levels |
| Swelling | • Puffiness around wound • Raised skin surface • Increased firmness | Body’s response to infection | • Apply cold compress • Keep head elevated • Avoid all products |
Keeping Your Makeup Routine Safe

Let me share with you my tried-and-true system for preventing infections when you’re working with makeup. I’ve developed these practices over years of working with different skin types and countless makeup applications. Think of this as your safety checklist –
- Pre-Makeup Hand Hygiene
- Wash hands for full 20 seconds with soap and warm water
- Use proper handwashing technique (between fingers, under nails)
- Dry completely with clean towel
- Keep hand sanitizer in makeup bag for emergencies
- Cross-Contamination Prevention
- Avoid touching phone during makeup application
- Don’t touch doorknobs/handles between steps
- Keep hair tied back to prevent touching
- Use clean tissue/paper towel if need to touch anything
- Between-Product Safety
- Re-sanitize hands when switching product types
- Avoid touching face unnecessarily
- Use disposable applicators when possible
- Keep clean brushes separate from used ones
- Necessary Supplies to Keep Ready
- Hand soap at makeup station
- Travel-size hand sanitizer
- Clean towel for hand drying
- Disposable hand wipes
- Fresh tissues/paper towels
- Regular Checkpoints During Application
- Check hands are still clean before each new product
- Monitor for any new cuts or scrapes
- Watch for skin sensitivity
- Ensure tools remain uncontaminated
Clean Makeup Workspace
Your makeup setup needs to be as clean as a professional artist’s station – I’m serious about this! I’ve learned that many infection cases come from contaminated surfaces rather than the products themselves. Here’s how I set up my workspace: I always lay down a clean towel or disposable mat where I’ll be placing my products. Think about it – you’ve probably set your makeup bag on various surfaces throughout the day, from bathroom counters to car seats. Those surfaces can harbor bacteria that could transfer to your products and eventually to any small cuts on your face.
I keep a pack of sanitizing wipes nearby and give my workspace a quick wipe-down before I start. Something most people don’t think about is keeping their makeup area away from the toilet – every time you flush, microscopic particles can spread through the air and settle on your makeup tools. That’s why I recommend setting up your makeup station in your bedroom rather than your bathroom whenever possible.
Sanitizing Your Makeup Tools
This is probably the most important section, so pay attention! I’ve seen too many people using dirty brushes and sponges, wondering why their small cuts aren’t healing. Here’s my complete system for keeping your tools clean and safe:
| Tool Type | Cleaning Frequency | Recommended Cleanser | Cleaning Method | Drying Instructions | Special Care Notes |
| Makeup Brushes | Weekly/After heavy use | • Gentle brush cleanser • Unscented baby shampoo | • Wet bristles • Gentle massage with cleanser • Rinse thoroughly | • Hang upside down • Well-ventilated area • 6-8 hours drying time | • Reshape bristles when wet • Never dry in closed spaces |
| Beauty Sponges | After each use | • Gentle soap • Specialized sponge cleaner | • Soak in cleanser • Squeeze repeatedly • Rinse until water runs clear | • Open air drying • Well-ventilated space • Away from bathroom | • Replace every 3 months • Never store damp |
| Metal Tools (Tweezers, Curlers) | After each use | • Rubbing alcohol (70%) • Sanitizing solution | • Wipe with alcohol • Let solution sit 30 seconds • Wipe dry | • Air dry 5 minutes • Wipe with clean cloth | • Check for rust • Store in dry container |
| Disposable Tools | Single use only | N/A | Discard after use | N/A | • Never reuse • Store unopened tools in clean space |
| Tool Holders/Cases | Weekly | • Antibacterial soap • Sanitizing wipes | • Wipe thoroughly • Clean all corners • Remove debris | • Air dry completely • Keep away from humidity | • Replace if damaged • Keep away from bathroom |
Your Makeup First Aid Kit
Let me share something crucial that most people overlook. You know those tiny symbols on your makeup products showing a jar with a number like “6M” or “12M”? I used to ignore them too, but trust me, they’re super important for preventing infections. These numbers tell you how many months your product is safe to use after opening. I’ve created a simple guide for you to follow, based on my experience and dermatologist recommendations:
| Product Type | Shelf Life | Signs It’s Time to Replace |
| Mascara | 3-4 months | Clumping, unusual smell |
| Liquid Foundation | 6-12 months | Separation, color change |
| Powder Products | 12-18 months | Hard film on surface |
| Lipsticks | 12-18 months | White spots, odd texture |
| Eyeliner | 3-6 months | Drying out, crumbling |
Emergency Care for Makeup-Related Wounds
Sometimes accidents happen, even when you’re being careful. I remember once nicking myself with an eyebrow razor right before an important event – talk about panic! Here’s exactly what you need to do if you get a cut or scratch while doing your makeup. First things first, stop what you’re doing immediately.
I know you might be in a hurry, but these next few minutes are crucial for preventing infection. Start by washing your hands thoroughly – this is non-negotiable! Then, take a clean cotton pad (not a tissue, as it can leave fibers in the wound) and gently clean the area with warm water. I always keep a small first aid kit in my makeup bag just for these situations.
You’ll want to apply an antibiotic ointment if the cut is more than just a surface scratch. The most important thing? Skip makeup on that area until it’s completely healed. I know it’s tempting to cover it up, but applying makeup to an open wound is like inviting bacteria to a party – not a good idea!
Creating Your Makeup Emergency Kit
I’m going to share with you exactly what I keep in my makeup emergency kit. This has saved me (and my clients) countless times! Here’s what you need to keep separate from your regular makeup supplies: Start with travel-sized antiseptic wipes – these are perfect for quick clean-ups. I also include small band-aids that are specifically designed for facial use; they’re less noticeable than regular ones.
Keep a tiny bottle of alcohol-free witch hazel – it’s gentler than regular antiseptics but still effective for cleaning small wounds. One of my best tips is to include a small pack of hydrocolloid patches. These are amazing because they protect the wound while being nearly invisible and you can actually apply makeup over them if you absolutely must cover the area.
Don’t forget to include a small tube of antibiotic ointment and some clean cotton swabs for application. The key is keeping everything in a separate, sealed plastic bag to prevent contamination. I replace everything in this kit every six months, even if I haven’t used it – better safe than sorry!
Proper Wound Care During Makeup
Let’s talk about how to handle your makeup routine when you’re dealing with a healing wound. I learned this the hard way after trying to cover up a scratch too soon – big mistake! When you have a healing wound, your regular makeup routine needs some serious adjustments. First, think of your skin like a protective shield that’s been broken – every product you put on it needs to be extra clean and safe. I usually wait at least 24-48 hours before applying any makeup near a wound, even if it’s just a tiny scratch.
During this time, keep the area clean and moisturized with an unscented, hypoallergenic moisturizer. If you absolutely must wear makeup (trust me, I get it – those important events won’t reschedule themselves!), I’ve developed a special technique. Start by applying a thin layer of petroleum jelly around (not on) the wound to create a protective barrier. This prevents any makeup from seeping into the wounded area while still allowing you to blend products on the surrounding skin.
Long-Term Prevention Strategies
Prevention is way better than dealing with an infection, right? I’ve developed some long-term strategies that have helped me maintain a safe makeup routine for years.
Product Organization System
- Use clear storage containers/organizers
- Create separate compartments by product type
- Label everything clearly
- Keep daily items easily accessible
- Store special-occasion items separately
Expiration Date Tracking
- Add sticky labels to all products
- Write opening date on each item
- Include expected expiration date
- Set phone reminders for replacements
- Monthly check of expiration dates
Storage Solutions
- UV sanitizing case for brushes
- Clean, dry drawers for products
- Dust-free containers
- Temperature-controlled area
- Away from direct sunlight
Daily vs Special Occasion Items
- Separate storage areas
- Different cleaning schedules
- Track usage frequency
- Regular rotation system
- Clear labeling system
Investment in Protection
- UV sanitizing equipment
- Quality storage containers
- Proper cleaning supplies
- Backup tools and brushes
- Professional-grade sanitizers
Monthly Maintenance Routine
- Inventory check
- Deep clean of storage areas
- Update tracking labels
- Replace expired items
- Reorganize as needed
Building Healthy Makeup Habits
This is where I get real with you about creating lasting habits that protect your skin. Think about your current makeup routine – are you rushing through it every morning? That’s when accidents happen! I’ve completely transformed my approach to applying makeup and I want to share these life-changing habits with you.
| Category | Important Habits | Why It Matters | Pro Tips | Safety Benefits |
| Lighting Setup | • Natural window light • Magnifying mirror • Additional task lighting • No shadows on face | Prevents accidents from poor visibility | • Face window when applying • Use daylight bulbs • Adjust mirror height properly | • Better tool control • Reduced risk of cuts • Accurate application |
| Time Management | • Wake up 15 mins early • Set realistic timeframes • Plan application order • No rushing with tools | Rushing leads to accidents and mistakes | • Prep tools night before • Follow same order daily • Build in buffer time | • More careful application • Reduced accidents • Better concentration |
| Weekly Tool Audit | • Check brush condition • Inspect metal tools • Test tool sharpness • Look for wear signs | Prevents accidents from damaged tools | • Sunday evening checks • Keep replacement log • Document issues found | • Early problem detection • Safer tool condition • Regular maintenance |
| Workspace Organization | • Everything within reach • Clean, clear surface • Tools in order of use • Good ventilation | Creates efficient, safe workflow | • Use tool organizers • Keep cleaning supplies ready • Maintain clear space | • Less reaching/dropping • Better hygiene • Organized process |
| Daily Safety Checks | • Clean tools ready • Good lighting confirmed • Clear workspace • Hand washing station | Establishes safety routine | • Morning checklist • Post-use cleanup • Regular sanitizing | • Consistent safety • Infection prevention • Better results |
Final Thoughts
Let me wrap this up with some basic wisdom I’ve gained over years of working with makeup. You know, preventing infections while doing your makeup isn’t just about following rules – it’s about creating a routine that keeps you safe while still letting you enjoy your beauty process. I’ve seen too many people either completely ignore safety (yikes!) or become so paranoid they can barely touch their makeup. There’s definitely a happy medium!
Summary of Key Prevention Tips
Think of this as your everyday makeup safety checklist. I use these guidelines daily and they’ve never steered me wrong:
- Always start with clean hands and sanitized tools
- Keep your workspace organized and clean
- Check product expiration dates monthly
- Replace makeup products according to the schedule we discussed
- Never share eye makeup products with anyone
- Store makeup in a cool, dry place away from direct sunlight
- Clean brushes weekly and beauty sponges after each use
When to Seek Professional Help
Sometimes you need to know when to step back and get help. Here’s what I always tell my clients: if you notice any of these signs, it’s time to see a healthcare professional:
- Persistent redness that spreads beyond the wound area
- Unusual swelling or warmth around the wound
- Pus or colored discharge
- Fever or feeling generally unwell
- Any wound that hasn’t started healing after 3 days
Moving Forward
You need to take proper care of wounds to prevent infection and promote healing. Keep the wound clean, dry and protected, follow medical advice and take prescribed medications as directed. If symptoms worsen or don’t improve, consult a doctor to avoid complications and ensure proper recovery.