
Dirty brushes don’t warn you. They sit in the cup looking fine. Then one morning your foundation goes on patchy, the blush brush smells a little off, and your skin breaks out somewhere it didn’t used to.
Quick version if you’re rushing: wet the bristles pointing down, work in a gentle soap, rinse till the water runs clear, squeeze dry, reshape, lay flat. Keep water out of the metal part. That’s the job. The rest of this is why it matters and what quietly wrecks brushes.
Starting fresh or replacing a tired maintained set of makeup brushes? The routine is the same either way.

Why Clean Your Makeup Brushes?
- Preventing Bacterial Growth
- Improving Makeup Application
- Extending Brush Life
Your skin is the big one. Brushes collect oil, sweat, dead skin, and whatever bacteria is already on your face. It all packs into the base of the bristles.
Leave it long enough and you’re painting that back on every morning. That’s where a lot of “random” breakouts come from. It’s also the real link between clean tools and better skin health and hygiene.
Then the makeup itself. A clogged brush won’t lay product down evenly. You get streaks and patches. Most people fix that by piling on more foundation when a clean brush would’ve done it. And money. A caked brush stiffens at the base. The bristles splay. A good brush that should last years turns scratchy in months.

What you need (not much)

The cleanser is the only thing that really matters. Everything else is optional.
- A gentle cleanser: Mild soap, brush shampoo, even baby shampoo works.
- A textured mat: if your brushes are heavily loaded. A kitchen silicone trivet does the same job free.
- A microfiber towel: or any soft clean cloth.
- A drying rack: optional. Past about ten brushes it earns its place. A dish rack or a tilted egg carton works too.
One thing to skip: harsh soap. No dish soap, no stripping hand soap. They pull the natural oils out of the bristles and leave them dry and brittle. That’s the mistake behind every “hack” video where someone grabs the dish detergent.
Filling out a kit or swapping worn ones? This range of makeup brushes is worth a look.
Step-by-Step Guide: How to Clean Makeup Brushes
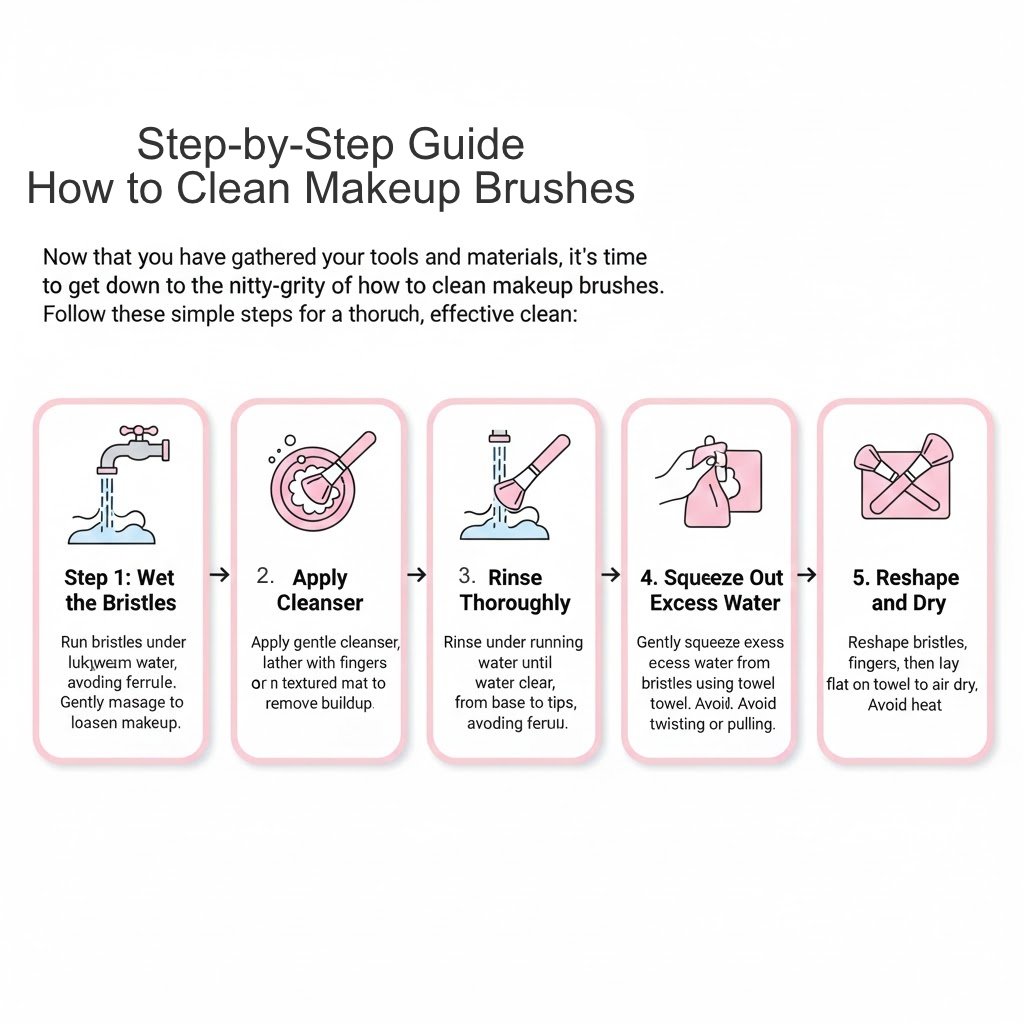
Two minutes a brush. One rule beats the rest: keep water out of the ferrule.
That’s the metal band joining bristles to handle. There’s glue inside it. Water gets in, the glue softens, the bristles drop. This is how most brushes actually die, and it’s completely avoidable.
- Wet the bristles, pointing down: Lukewarm, never hot. Hot water softens the glue same as soaking. Angle the head down so water runs off the tips.
- Work in the cleanser: Small amount, lather with your fingers or swirl on the mat. A foundation brush usually takes two rounds. Normal.
- Rinse till it runs clear: Still pointing down. No cloudiness, no soap left.
- Press the water out: Squeeze gently through the towel. Don’t twist, don’t tug. Tugging causes shedding, not washing.
- Reshape and lay flat: Pinch the head back to shape while damp. Lay it flat with the bristles just over the counter edge.
The drying part people get wrong
- This is where brushes die. So it gets more room.
- No hairdryer. No radiator. No sunny windowsill. Heat reheats that ferrule glue and warps the bristles stiff.
- Most brushes are dry by morning. Dense powder brushes take longer. Leave them.
- Flat on a towel, or bristle-down on a rack. Never up.
And drying brushes standing up in a cup, bristles at the ceiling? That’s quietly killing them. Water trickles down into the ferrule and the handle. The glue lets go. The wood can swell.
If water does get into the metal, lay the brush flat right away and let it dry fully before the next use.
Stuff that actually helps
How often: Daily makeup means once a week for anything touching your face, foundation and concealer especially. Eye brushes can stretch. Doing other people’s faces, every use. A spray clean covers you in between.
Go light with product: Overloading makes a mess on your face and crams more into the base. More scrubbing, faster wear. Tap the excess off first.
Store them dry and upright: once fully dry, somewhere that isn’t the bathroom. Bathrooms stay humid, and humidity breeds bacteria and warps bristles.
When to give up on a brush

New brushes shed a little and it means nothing. Three or four loose hairs in the first few uses are just strays that didn’t get pinched in during manufacturing. They stop after a wash or two.
What’s not normal:
- Clumps coming out.
- Hairs snapping in half.
- A head that won’t hold its shape.
- A smell that survives a wash.
That last one is bacteria the soap can’t reach. Bin job, not a cleaning job.
Most brushes give you a couple of years. Cheaper ones, less. And when one feels scratchy before you reach to apply makeup with it, clean it first. Half the time the problem is buildup, not the brush.